Uploading Photos
One of the best things about Vidigami is sharing photos you have taken with the school community!
On a Computer
Using "Upload":
- Have .jpg photos loaded on your computer in a folder. (If your images are HEIC, use Safari to upload or convert to Jpg before uploading.)
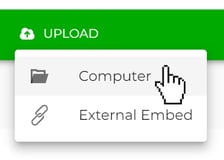
- In Vidigami, click on UPLOAD (top right):

- Click on "Computer":

- Navigate to the folder of photos on your device.
- Select the photos to upload and click on "OPEN".
- In the "Share Media" pop-up, click on "Share to a page"
(Note: if you were already on the page that you will be uploading to, go to Step 7):
- The "Share Media" pop-up will expand. In the "Choose Page" field, type in the name of the Page you are uploading to. Once located, select that page. (Note: If you were already on the Page that you are uploading to, the Page name will auto-populate.):

- OPTIONAL: Select an existing Album on the page, OR click "CREATE NEW" to start a new album (if you have been granted the permissions to do so).
- OPTIONAL: Add a description and/or Tags to your upload.
- Click "POST".
Using "Drag & Drop":
- Open the folder of .jpg photos on your computer.
- In your browser, navigate to the Page or Album you will be uploading to.
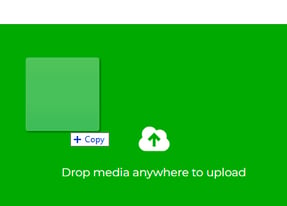
- Select all the photos in the folder and drag to the browser window:

- Follow steps 7-9 above.
On an iPhone
- Make sure you have the V3 Vidigami App Installed.

- Click on +
- Click on the Upload Media Icon.
- Click on Photo Library.
- Click on the photos you want to add to Vidigami.
- Click Add.
- Follow steps 6-9 above.
On an Android
- Make sure you have the V3 Vidigami App Installed.

- Click on +
- Click on the Upload Media Icon.
- Select Files.
- Click the Gallery Button and select photo(s) for upload.
- Follow steps 6-9 above.
TIP: When using a computer, photos should be saved as .jpg or .png. You can upload .heic from a Mac using Safari and the "Upload" option.
NOTE: The school determines which users can contribute and on which Pages. If you are unable to upload photos, check with your school’s Vidigami Admin.