Creating an Album
An Album is where you upload media on a Page.
An Album can be created directly on a Page or when uploading media by:
- Who can create an Album? Any user that has the "Add Album" option enabled in their Role.
To create an Album on a Page:
- Go to any Page.
- Click the "Album" icon at the top right of the page:

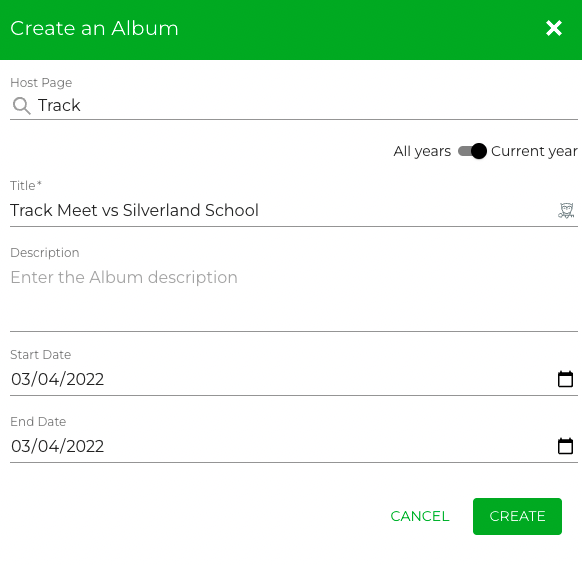
- In the "Create an Album" pop-up, type in a title and optionally the description for the new Album.
- The Start and End Dates will be the current date by default. You can change these to any date within the school year, from one day to a full school year range. (NOTE: The date is only used as a way to organize the Albums. It does not limit when users can view and / or contribute.)
- Click "CREATE" to close the pop-up:

To create an Album during upload:
- Click on "Upload" at the top right (on a computer) or click the + on a mobile device.
- Select the photos/videos for upload.
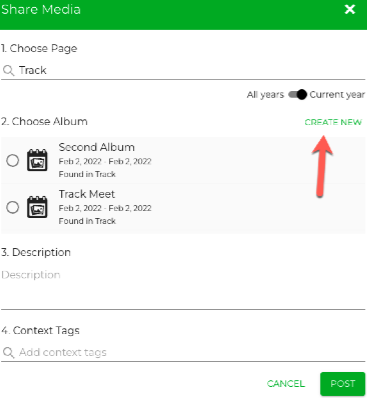
- The "Share Media" pop-up will appear.
- Ensure that the Page name at the top is correct. (If not, search for the correct Page.)
- Click "CREATE NEW".
- The Album creation dialog box (see above) will pop up. Type in the information and click CREATE.
- Click POST.
