Creating and modifying a Collection
Collections are "working folders" that provide a central space for users to collect and organize media from different sources within Vidigami. This is ideal for projects such as yearbooks, weekly parent newsletters, and marketing projects.
*Please note that being able to create a Collection depends on your role permissions.
TABLE OF CONTENTS:
1) Create a New Collection
2) Add Media to a Collection
3) Access a Collection
4) Sort/Organize Media in a Collection
5) Remove Media from a Collection
6) "See All" to display additional Collection information
7) Icons Displayed on Collection Thumbnails
1. Create a New Collection:
1.1) Click on your name in the left column of the Vidigami homepage (A), then click on "CREATE A COLLECTION" (B):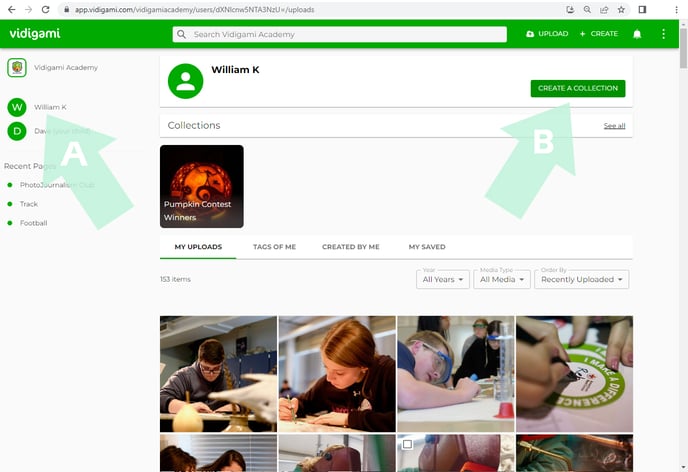
1.2) In the "Create a Collection" pop-up, enter a title and description for your new collection, then click on "CREATE":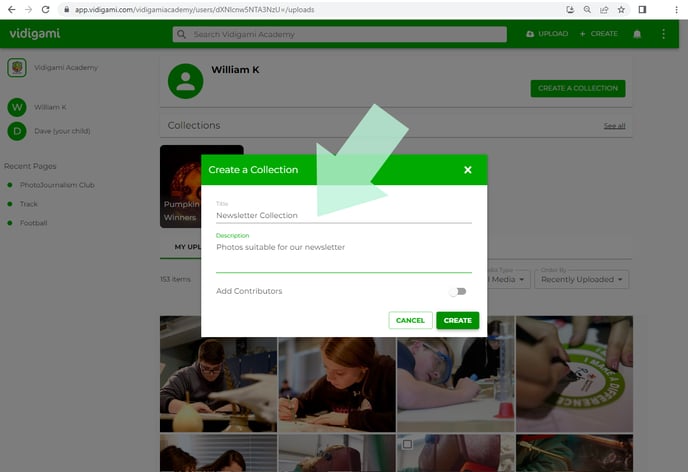
1.3) The new collection folder is now available for use:

2. Add Media to a Collection:
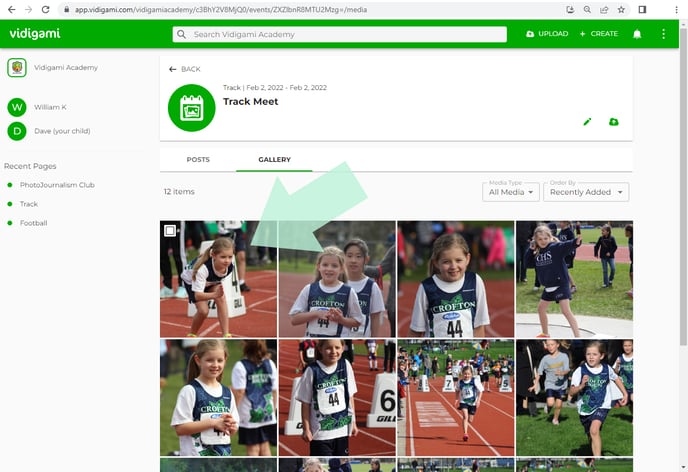
2.1) Click on any image thumbnail to open the Lightbox:
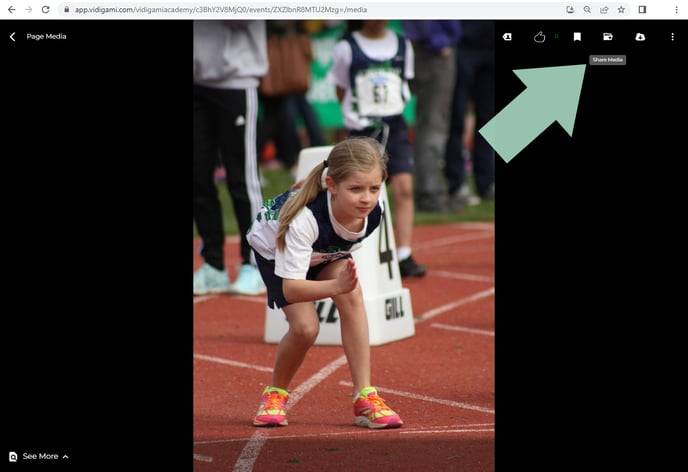
2.2) In the Lightbox, click on the "SHARE MEDIA" icon:
2.3) In the Share Media pop-up, click on "Add to a Collection":
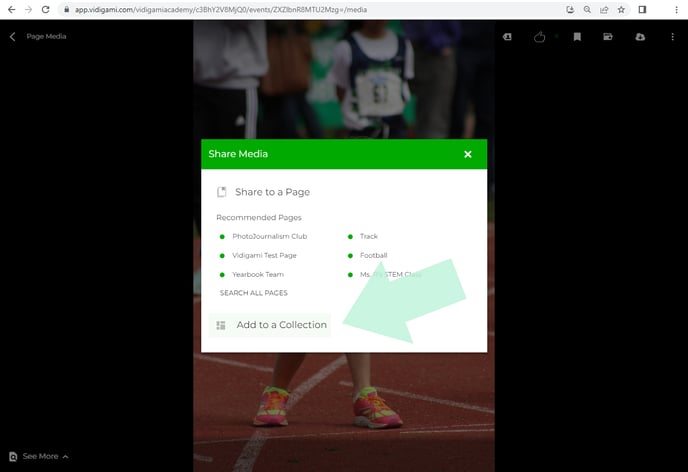
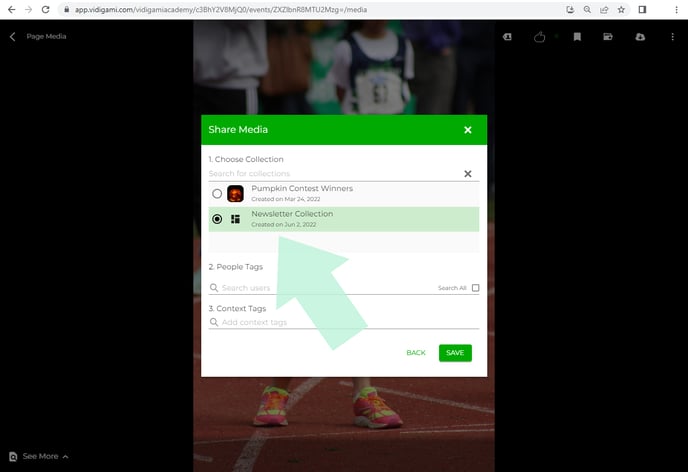
2.4) Select the collection folder where you want to add this photo or video, then click on "SAVE":
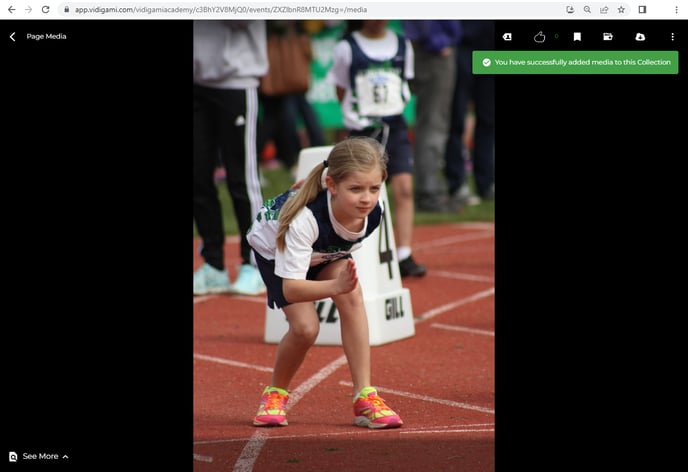
2.5) The media has now been added to your collection folder:
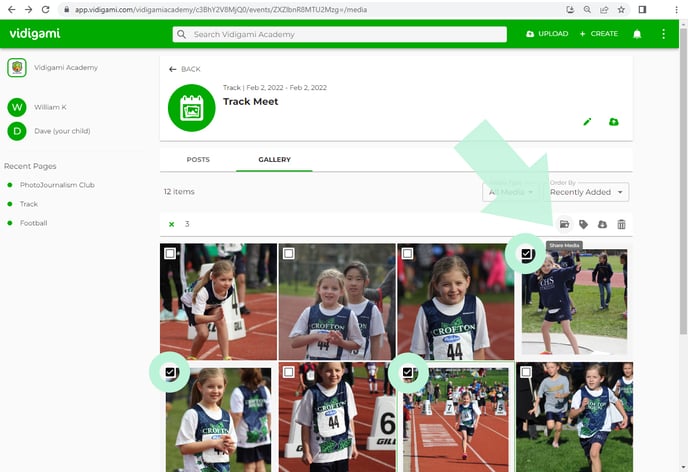
2.6) To add multiple photos or videos (from an album) to a collection, select each photo or video by hovering over the top left corner of each thumbnail and clicking to activate the checkmark. After selecting all of the images that you want to add, click on the "Share Media" icon:
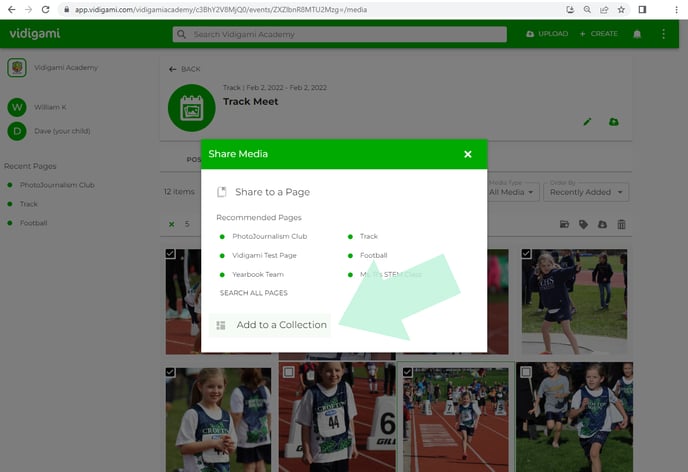
2.7) In the "Share Media" pop-up, click on "Add to Collection":
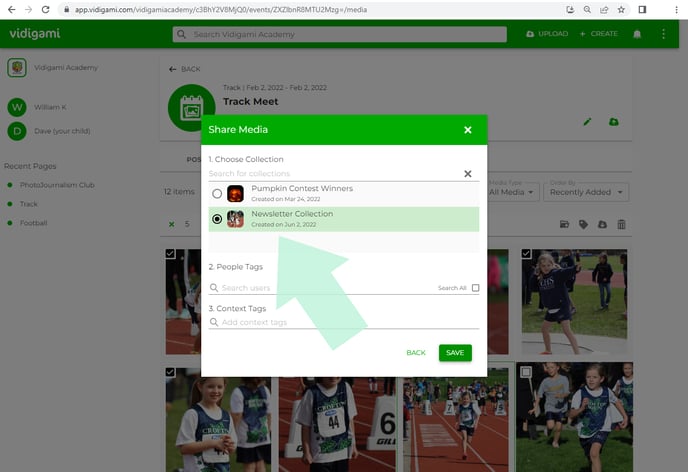
2.8) Select the collection folder from the list, then click "SAVE":
2.9) All of the media added to your collection folder is now available:
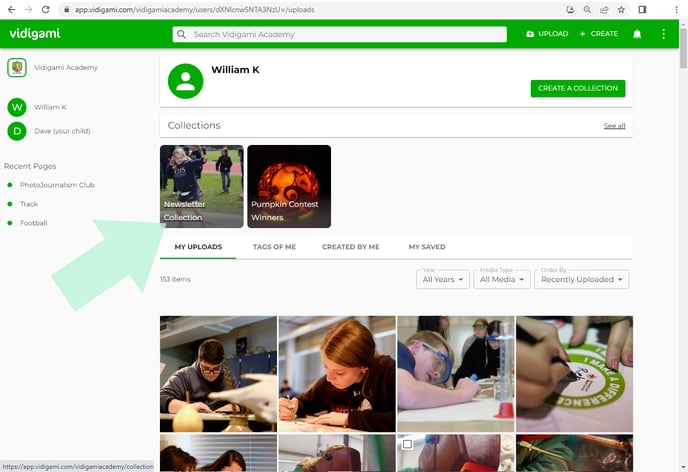
3. Access a Collection:
3.1) Click on your name in the left column to return to your home page.
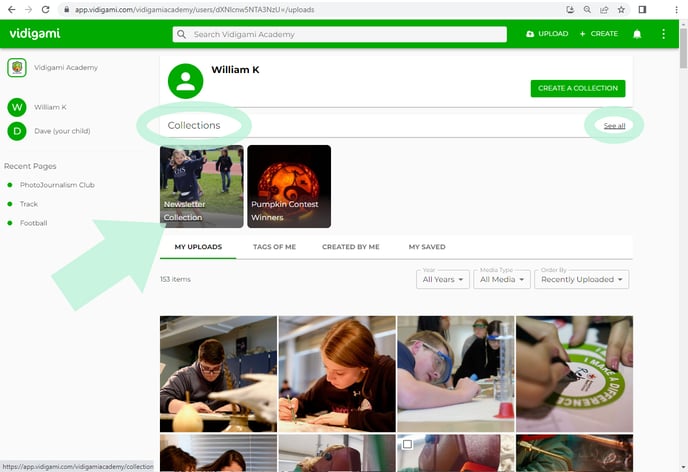
Under the "Collections" header you will see all of your available collection folders.
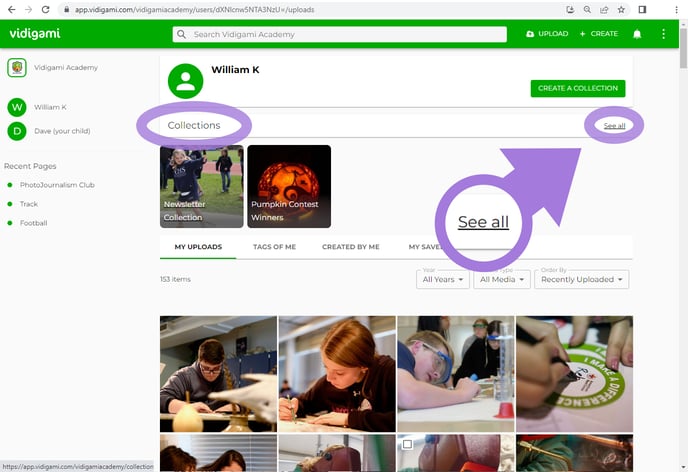
(Click on “See all” to expand the view, if you have several collections.)
To open a collection folder, click on the folder thumbnail:
3.2) All of the photos or videos in your collection are now visible:
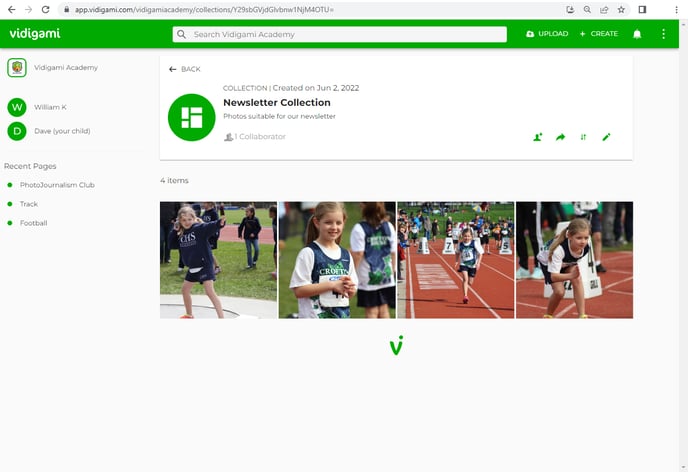
4. Sort/Organize Media in a Collection:
4.1) Within the collection folder, click on the "SORT COLLECTION" icon:
![]()
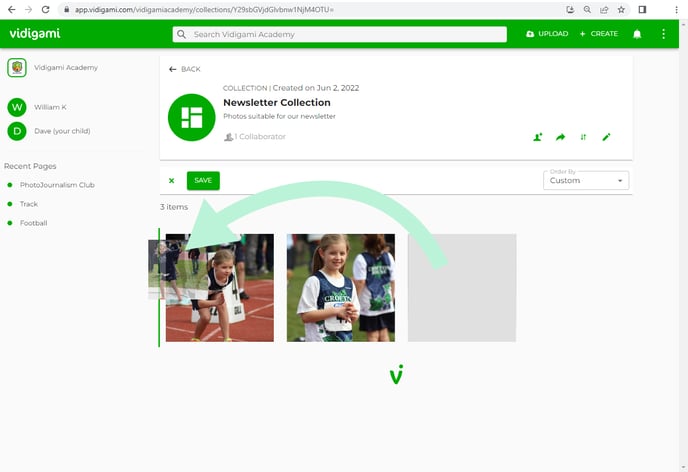
4.2) Simply click on any thumbnail and drag it into another spot. The order of the thumbnails will re-sort accordingly. Click on "SAVE" to finalize the changes:
5. Remove Media from a Collection:
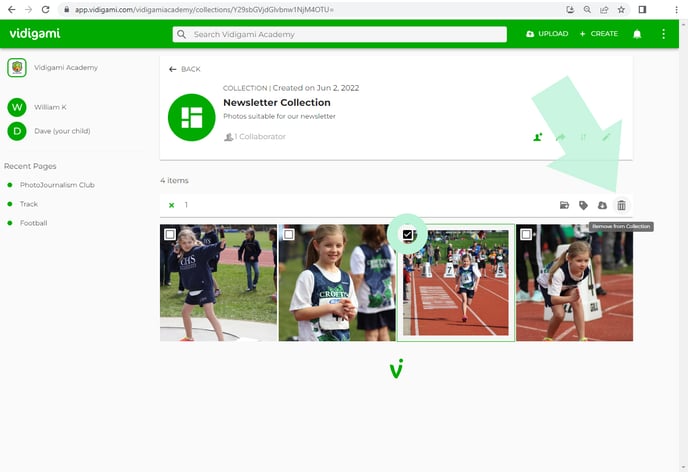
5.1) To remove media from a collection folder, click the checkmark on the top left corner of a thumbnail, then click on the "REMOVE FROM COLLECTION" icon:
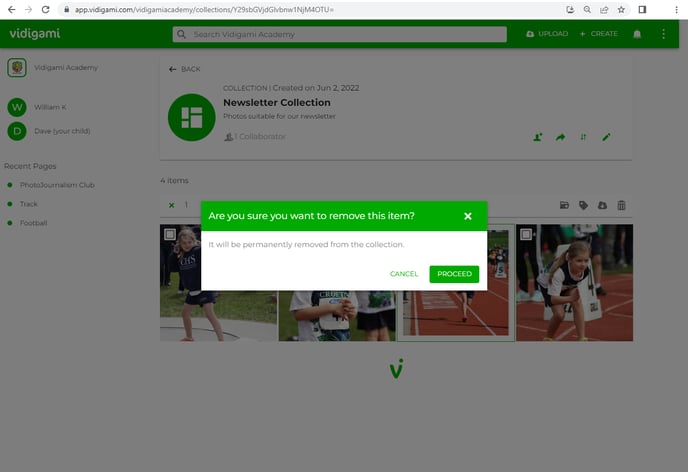
5.2) In the "Are you sure you want to remove this item?" pop-up, click on "PROCEED" (or "CANCEL" if you change your mind):
6. "See All" to display additional Collection information
On the Collections header, click on “See all” to expand the view of your collections folders:
In your expanded Collections page, there are two tabs:
"My Collections" and "Shared Collections":
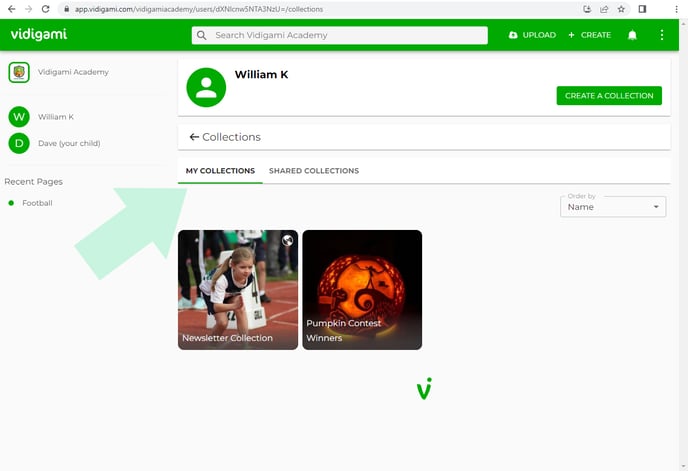 "My Collections" Tab - displays all of your personal collections (you are the only one who can view and interact with these collections).
"Shared Collections" Tab - displays all the Collections that others have shared with you.
7. Icons Displayed on Collection Thumbnails:
Shared to a Page ("page" icon): .
. 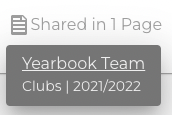
Click on the thumbnail to open the Collection. At the top of the Collection page you will see how many other Pages it is shared with. Click on this to see where the Collection is shared.
Shared with Other Users ("people" icon):
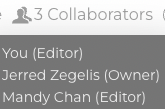
Click on the thumbnail to open the collection. At the top of the collection page you will see how many Collaborators there are. Click on this to view the list of Collaborators.
Public ("globe" icon):

The Public icon will be displayed when you share this collection publicly as a Slideshow. You can remove this option from a collection at any time by clicking on the pencil icon and toggling "Make Public" off.
